Showing posts with label upcycle. Show all posts

Saturday, November 15, 2014

DIY Envelope Template


Here's an easy way to make an envelope template to fit any card size. You'll need an envelope that's too big for the card, scissors, and tape (removable if you want to be able to resize the template).

Gently unfold the envelope.


Cut it into four pieces. It doesn't have to be exact, but cut so you cross somewhere near the middle.
I like to number the pieces before cutting to help keep things in order, but you don't have to.


Place your card in center of the envelope pieces, and fold the envelope around it so it fits properly.
Tape the pieces in place. You should only need one piece of tape on the side without the flap.
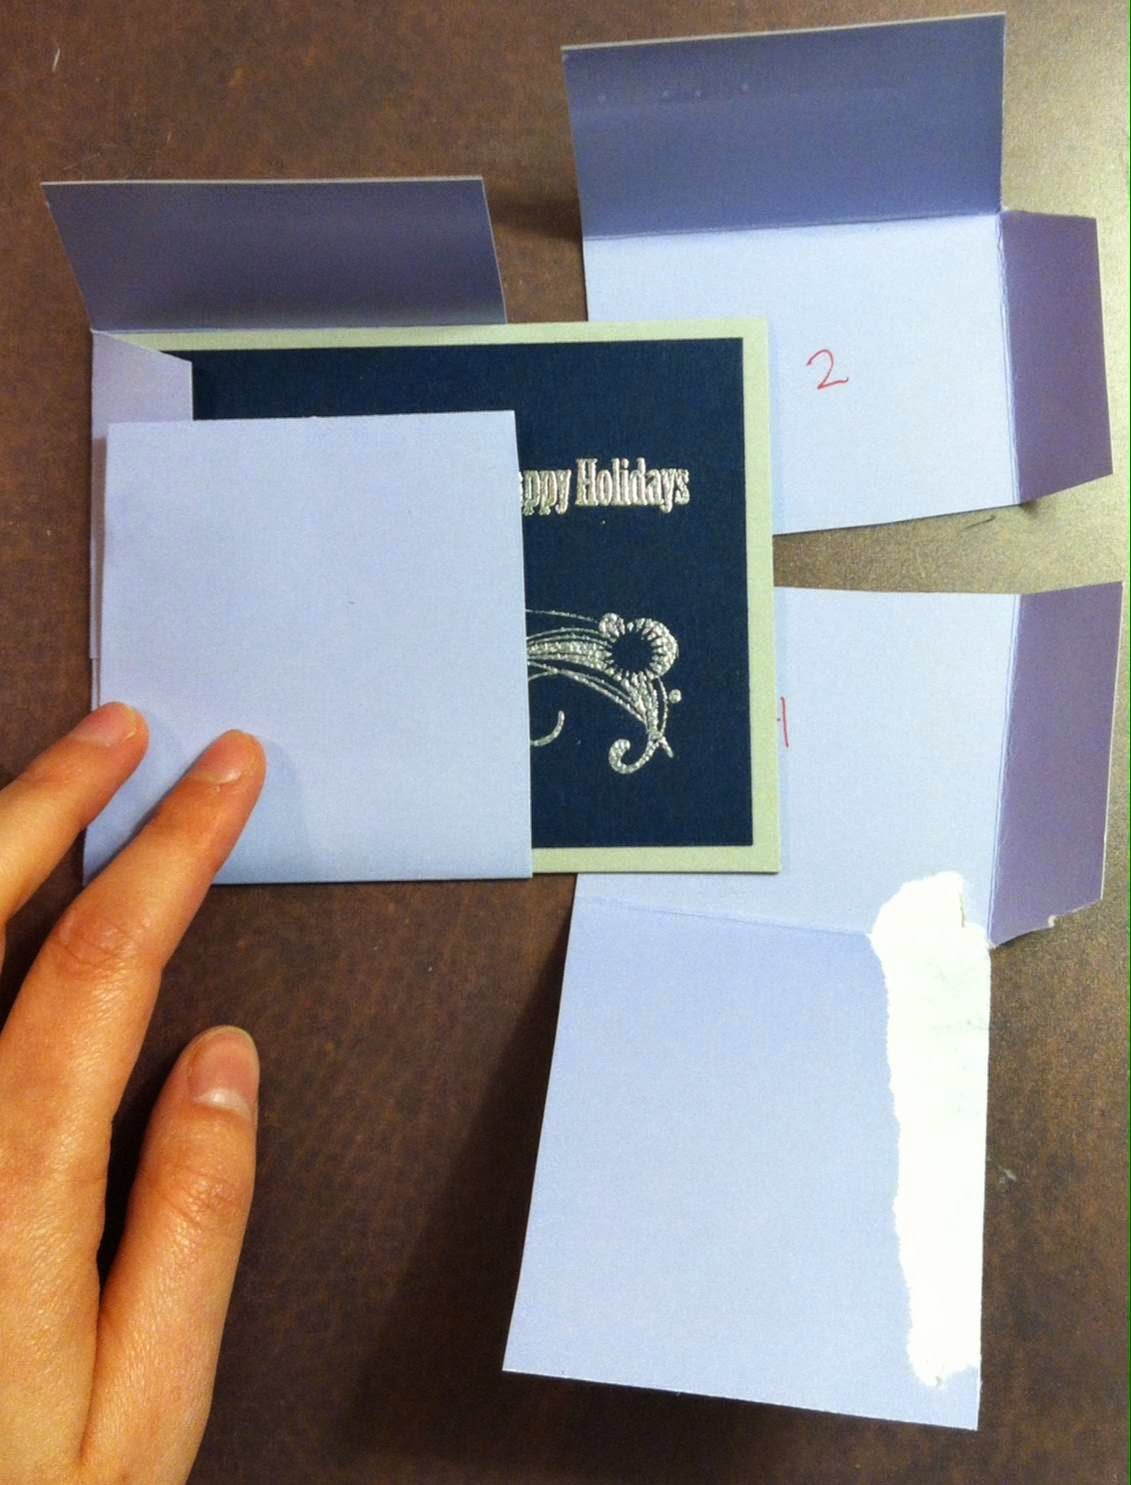


Now you have a template. Trace on your paper, cut it out, and glue it together as the original envelope was.


Friday, November 14, 2014

DIY Stamps in a Tin


What you'll need:
craft foam
glue (unless you use self-adhesive foam)
tape
punch in desired shape
cardstock
empty Altoids tin


Cut a piece of cardstock to fit inside the tin. 
Punch shapes out of the foam. I used some self-adhesive foam shapes from the dollar store, and punched stars.
Glue the shapes to the cardstock. 


Add tape to the backside of the cardstock, to create a slick surface. This is so you can remove the tape from the next step easily.
Roll a piece of tape inside out (try not to make it too bulky) and use it to stick the slick part of the cardstock to the smooth underside of the Altoids box.


Now you're ready to stamp!


If you used pre-cut shapes, and you actually like them, you can just make them into stamps without any punching.


When you're done stamping, just remove and throw the rolled tape away, or reuse with another stamp. 
You can create several stamps and store them in the tin.

Wednesday, October 22, 2014

Xmas Carol Card

Here's a more xmasy card. My second one ever.


Using gold craft paint and a makeup sponge, I painted the top and bottom. Once it was dry, I stamped the Have yourself a merry little Christmas stamp.


I then picked a red and gold cardstock portion, and traced some of the lines with gold glitter glue.


I made the holly by drawing leaves freehand, cut them out to make a stencil, then traced them onto sheet music, cut them out, and colored the edges with a dark green colored pencil.


For the berries, I had some black plastic berries that came in a flower arrangement that I randomly won at AC Moore. I brushed them with white glue, dipped them in red glitter, and let them dry.
Then I stuck everything together and that was it! Simple, huh?


Saturday, September 6, 2014

Secret Bathroom Stash

Our only downstairs bathroom is a tiny half bath with no built in cabinets, and little room for any stand alone storage. I could have bought something, but after already having a basket/shelf that was perfect, I decided to just go with that.

The problem? No place to hide feminine products. Yes, I'm talking about pads and tampons. While I'm wiling to let spare tp sit exposed in a pretty stand, I really don't want those little yellow packages on display.


The solution? Gift boxes! Tampons fit perfectly in a bracelet box. I had a gold one that went well with the red paint in the bathroom. For the pads, I didn't have the right gift box, but I had an empty box of chocolates that was the perfect size. So I pulled out some gold and white wrapping paper, glued a piece the the top, and it fit right in.

Friday, August 29, 2014

Old Clothes on Display

I'd always been interested in displaying old shirts the way DIY TV shows create fabric wall art, but I never got around to buying canvas frames or a staple gun. Then I realized there are easier ways.

1) Use a picture frame. Just remove the glass, cut the fabric using the backing as a template, and pop it into place. You may need to tape the fabric to the backing to keep it still while you secure it.

2) Use an embroidery hoop. I paint mine to complement the fabric first. Here are two ways to hide excess fabric before hanging:
easier way
prettier way