So, these are the ones I came up with that I would actually give to people:
A storage place for the little things I do around the house in between raising a kid and writing on wattpad.
Showing posts with label papercraft. Show all posts
Monday, July 25, 2016
Inspirational Quote Cards
I like the idea of people keeping cards for more than sentimentality. A good way to encourage that is to use inspirational quotes. I had to really dig for these quotes, though, because many are along the lines of "life is short, get off your butt", and who wants to receive that on a card?
Saturday, April 25, 2015
Mother's Day
My mom has way too much stuff, so for Mother's Day this year, I wanted to make her something creative and useful. I made several different blank cards, and stamped some sentiments on separate pieces of cardstock to be added as she sees fit.
I couldn't find a good gift box, so I cut and resized a tissue box, wrapped the cards and envelopes in tissue, and tied it with a ribbon.
| Don't you love my messy table? |
I couldn't find a good gift box, so I cut and resized a tissue box, wrapped the cards and envelopes in tissue, and tied it with a ribbon.
After all that cardmaking, I couldn't bring myself to make an actual Mother's Day card (plus I don't have a sentiment for that--for shame!), so I just made a little tag.
Saturday, November 15, 2014
DIY Envelope Template
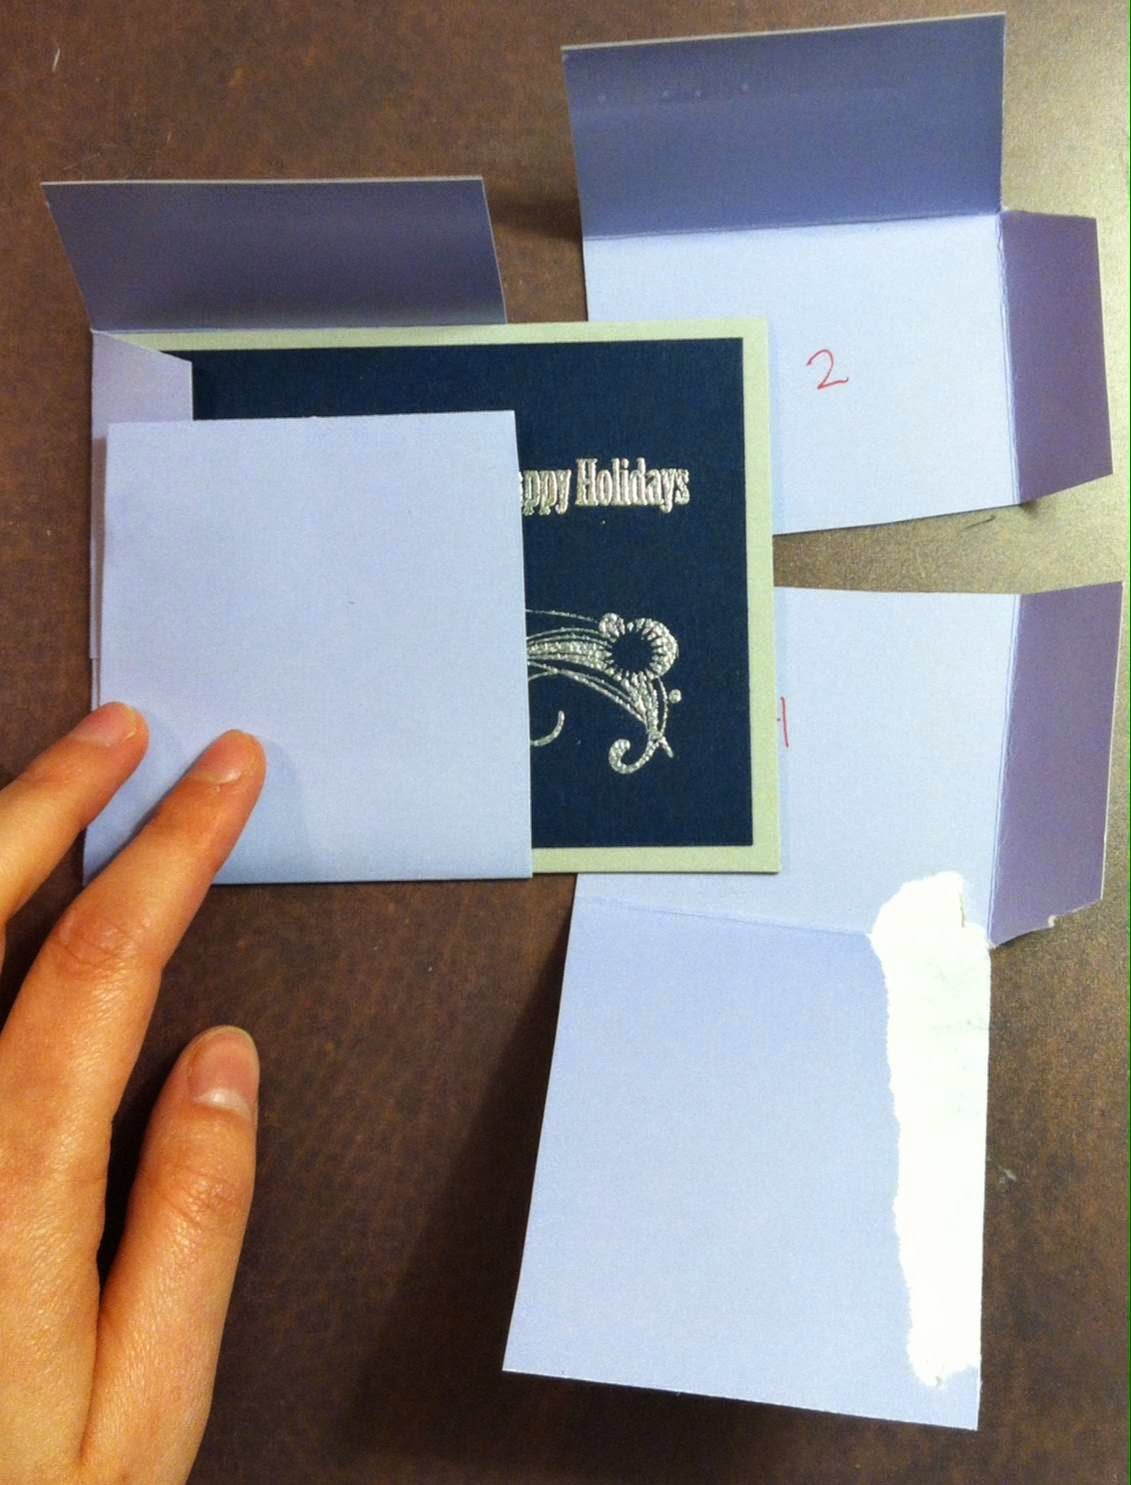
Gently unfold the envelope.
Cut it into four pieces. It doesn't have to be exact, but cut so you cross somewhere near the middle.
I like to number the pieces before cutting to help keep things in order, but you don't have to.
Place your card in center of the envelope pieces, and fold the envelope around it so it fits properly.
Tape the pieces in place. You should only need one piece of tape on the side without the flap.
Now you have a template. Trace on your paper, cut it out, and glue it together as the original envelope was.
Friday, November 14, 2014
DIY Stamps in a Tin
What you'll need:
craft foam
glue (unless you use self-adhesive foam)
tape
punch in desired shape
cardstock
empty Altoids tin
Cut a piece of cardstock to fit inside the tin.
Punch shapes out of the foam. I used some self-adhesive foam shapes from the dollar store, and punched stars.
Glue the shapes to the cardstock.
Add tape to the backside of the cardstock, to create a slick surface. This is so you can remove the tape from the next step easily.
Roll a piece of tape inside out (try not to make it too bulky) and use it to stick the slick part of the cardstock to the smooth underside of the Altoids box.
Now you're ready to stamp!
If you used pre-cut shapes, and you actually like them, you can just make them into stamps without any punching.
When you're done stamping, just remove and throw the rolled tape away, or reuse with another stamp.
You can create several stamps and store them in the tin.
Monday, November 10, 2014
Card with a Pocket
I like Inkadinkado's Sing Like No One's Listening stamp so much, but I used it as a magnet instead of a card, so I thought it would be nice to create a card that would hold it.
First I needed a pocket. I originally used a regular piece of paper to make a template, then recreated it with a piece of cardstock. It's basically just a piece that's folded in half, then both sides are folded back at the right size for the magnet, and taped. Here is the back of the pocket:
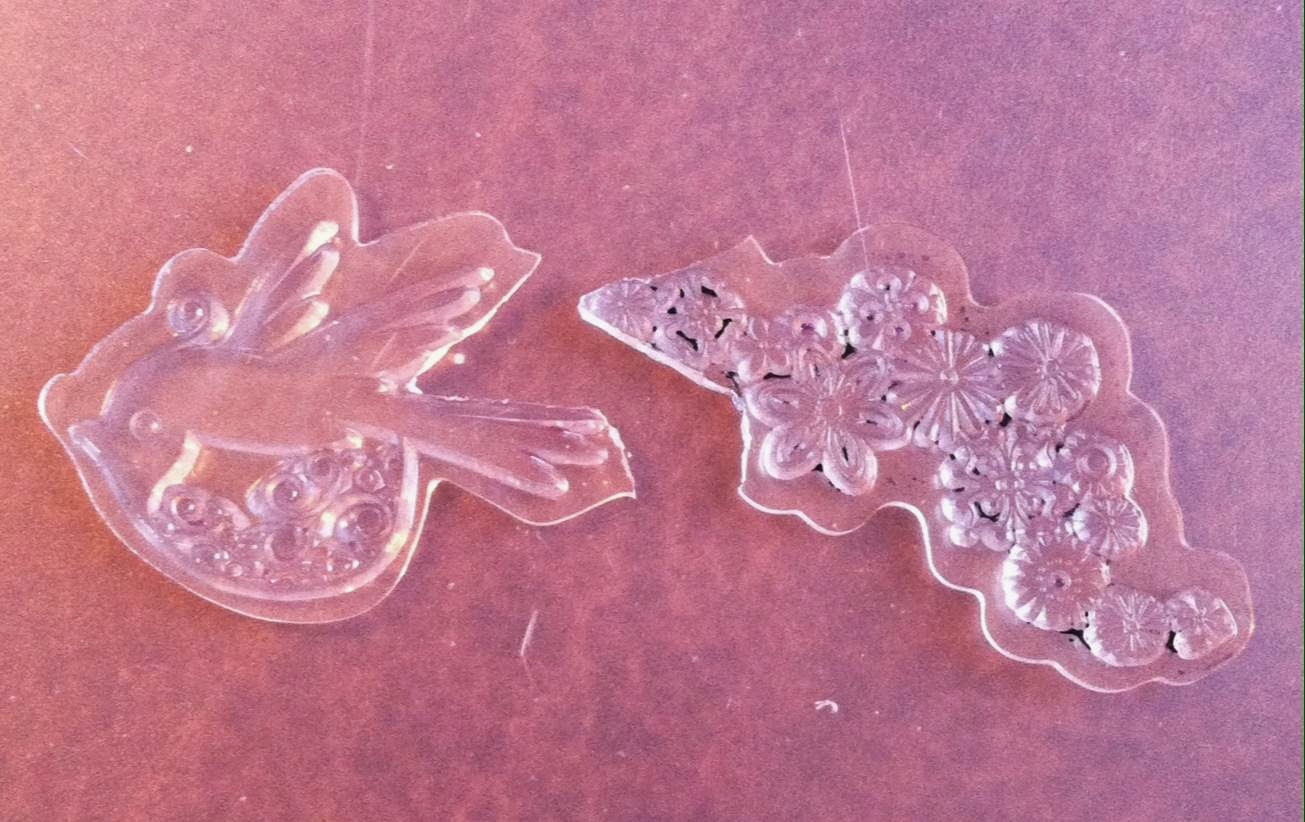
For the front of the pocket, I used an Inkadinkado bird (one I previously cut in two, but still works just fine), watercolor pencils, and a couple of jewels.
I watermarked the background of the inside of the card with my xmas carol stamp, to infuse a bit of holiday spirit.
For the front of the card, I used another Inka bird stamp, and did emboss resist with watercolors. The sentiment, by Momenta, was stamped with Versamark + pink pigment ink on one half + lavender dye ink on the other, since I don't have pigment of that. It's a bit messy, but I'm okay with it.
Saturday, November 8, 2014
Owl Window Gift Tag
Here's a gift tag I made for my nephew.
I embossed an owl from Inkadinkado on the inside of a small card.
Then I punched a piece of scrap with a 1inch circle punch. Using the punched piece, I decided where I wanted the window, and measured the distance from the top and side. Then I made marks on the front of the card to guide my punch.
I stamped "Who?" on the outside, and on the inside, wrote my nephew's name.
I embossed an owl from Inkadinkado on the inside of a small card.
Then I punched a piece of scrap with a 1inch circle punch. Using the punched piece, I decided where I wanted the window, and measured the distance from the top and side. Then I made marks on the front of the card to guide my punch.
I stamped "Who?" on the outside, and on the inside, wrote my nephew's name.
Friday, November 7, 2014
Happy Birthday Nana
It was my mother-in-law's birthday recently, so what better way to try out my new embossing stuff?
I originally wanted just purple on lavender, but I cut the purple wrong, so I layered it with black to make up for the mistake. The sentiment it stamped with lavender and then an offset black. I don't have a corner rounder, so I just used a pair of scissors. It wasn't easy.
The embossing was a bit tricky too. I wanted to use two different colors with one stamp, and I tried a few different ways I'd seen online, but none worked well for me, so I had to resort to surgery.
yeah, the picture's terrible
I originally wanted just purple on lavender, but I cut the purple wrong, so I layered it with black to make up for the mistake. The sentiment it stamped with lavender and then an offset black. I don't have a corner rounder, so I just used a pair of scissors. It wasn't easy.
The embossing was a bit tricky too. I wanted to use two different colors with one stamp, and I tried a few different ways I'd seen online, but none worked well for me, so I had to resort to surgery.
this bird is from Inkadinkado
I stamped and embossed the bird first, then lined up the leaves on the acrylic block, so when I removed the bird part the leaves would fit around the embossed bird. Surprisingly, it worked very well.
The inside required some cutting too. I don't have any flower stamps, so I cut some off another Inka bird.
I also added a couple of punched butterflies to the front, but I forgot to take a picture before I gave it to her. She did love it though!
And in case you ever wondered, this is what happens when you emboss black powder on white ink:
Monday, November 3, 2014
Recollections Embossing Kit
I've been wanting to try heat embossing, but with all the equipment needed for it, I didn't think I ever would. Then I saw an embossing kit at Michaels by Recollections. I looked it up online to see reviews, but couldn't find anything. So I used a coupon, and bought it (original price was $40). It comes with a heat tool, six powders, six inks, and a funnel tray.
Colors: black, pink, silver, green, turquoise, and clear. The clear is the ink that looks yellow, and the powder that looks white.
So far, the inks and powders are nice, and the heating tool works well. Unfortunately, there is no anti-static bag / embossing buddy. But I just made one using this tutorial. I also didn't find the tray to be very useful, as the powder sticks all over it. Using coffee filters or a folded paper is much better. I will keep the tray and try it with glitter.
The bottom line is that it's a really good starter kit, especially if you get it cheap.
Also, here's my very first heat embossed image:
Colors: black, pink, silver, green, turquoise, and clear. The clear is the ink that looks yellow, and the powder that looks white.
So far, the inks and powders are nice, and the heating tool works well. Unfortunately, there is no anti-static bag / embossing buddy. But I just made one using this tutorial. I also didn't find the tray to be very useful, as the powder sticks all over it. Using coffee filters or a folded paper is much better. I will keep the tray and try it with glitter.
The bottom line is that it's a really good starter kit, especially if you get it cheap.
Also, here's my very first heat embossed image:
Sunday, November 2, 2014
Magnets
Since I've really gotten into all this papercraft crap, I've wanted to find other uses for the stamps. One thing I've come up with is magnets. Using flat magnets, like those you sometimes find with business cards, you can make very pretty images.
I got these large flat magnets in some craft kit ages ago, and had yet to find a use for them. So I took some cardstock that I liked, and Mod Podged it on. It's very pretty, despite my poor cutting job, but kind of impersonal.
So I pulled out this Winnie the Pooh stamp I had, and thought it would be great to make into a magnet for my niece to hang her artwork on the fridge. I used StazOn so the Mod Podge wouldn't make it run, and colored it with colored pencils.
Saturday, October 25, 2014
Little Butterfly Card
This card is really more of a gift tag, but it's my favorite so far.
I began by brushing the front of the card with some yellow watercolor. I don't have many ink pads, but you could go that route too. Then on a separate piece of cardstock, I did a gradient from yellow to blue in watercolor. When that was dry, I stamped it with a butterfly from Inkadinkado. I cut out the butterfly, folded it a bit in the middle, and glued it to the card.
With the leftover watercolor, I used a Recollections butterfly punch, folded those cutouts the same way, and glued them in "random" positions. I finished by dotting iridescent glitter glue around the background (though you can't see it too well).
I made another using a blue background, and a pink and purple butterfly. They're really cute little cards.
Wednesday, October 22, 2014
Xmas Carol Card
Here's a more xmasy card. My second one ever.
Using gold craft paint and a makeup sponge, I painted the top and bottom. Once it was dry, I stamped the Have yourself a merry little Christmas stamp.
I then picked a red and gold cardstock portion, and traced some of the lines with gold glitter glue.
I made the holly by drawing leaves freehand, cut them out to make a stencil, then traced them onto sheet music, cut them out, and colored the edges with a dark green colored pencil.
For the berries, I had some black plastic berries that came in a flower arrangement that I randomly won at AC Moore. I brushed them with white glue, dipped them in red glitter, and let them dry.
Then I stuck everything together and that was it! Simple, huh?
Using gold craft paint and a makeup sponge, I painted the top and bottom. Once it was dry, I stamped the Have yourself a merry little Christmas stamp.
I then picked a red and gold cardstock portion, and traced some of the lines with gold glitter glue.
I made the holly by drawing leaves freehand, cut them out to make a stencil, then traced them onto sheet music, cut them out, and colored the edges with a dark green colored pencil.
For the berries, I had some black plastic berries that came in a flower arrangement that I randomly won at AC Moore. I brushed them with white glue, dipped them in red glitter, and let them dry.
Then I stuck everything together and that was it! Simple, huh?
Tuesday, October 21, 2014
A Card for Mom, and Cupcakes
For the past few years, I have made the tags for all my xmas gifts. This year, I"m going a step further and have gotten into actual cardmaking. This is one of my first.
For the front, I used a stamp that I've had for many years, along with printed cardstock. I colored Pooh and Piglet with colored pencils, and inked the edges of the stamped pieces.
Inside, I used text stamps by Fiskars (cursive), and Kaisercraft. I'm not really fond of how the inside turned out, since the letters are spaced out so much, even though I trimmed down the extra space on each letter as much as I could.
For the hearts, I punched them out of some cardstock that looked like watercolor. Part of one heart faded to white, so I inked the edges of them all. In order to get the center of the curve, I used the edge of the ink pad.
On a side note, I recently took a Wilton cupcake decorating course at Michaels. It was lots of fun and I learned things that I never picked up by reading or watching videos. Here are my favorites:
Subscribe to:
Posts (Atom)